

You're standing over a short putt, one hand on the putter and the other searching every pocket for a ball marker. You find a tee, two loose coins, and a ball you forgot was there. The marker finally appears just as the group behind you starts looking impatient. A golf cap clip exists to prevent that small but irritating scramble.
The useful version isn't a decoration glued to your hat. It's a compact retention system that keeps a removable ball marker accessible while you play. The catch is that placement, pressure, brim shape, comfort, and rules all matter. A clip that looks sharp in the pro shop can still annoy your forehead, bend a performance visor, or disappear during a windy walk to the green.
What Is a Golf Cap Clip
A golf cap clip attaches to a cap brim, visor, or another part of headwear and holds a ball marker where your hand can reach it. The marker usually connects magnetically, so you can remove it without taking the clip off the hat. That arrangement turns a small accessory into a simple piece of course organization.
The need is easy to understand. You reach the green, mark your ball, pick it up, clean it, and replace it. A pocket works, but pockets fill with tees and scorecard pencils. A ball marker attached to your hat stays in the same place throughout the round, provided the clip grips securely and you put it somewhere your hand can find without looking.
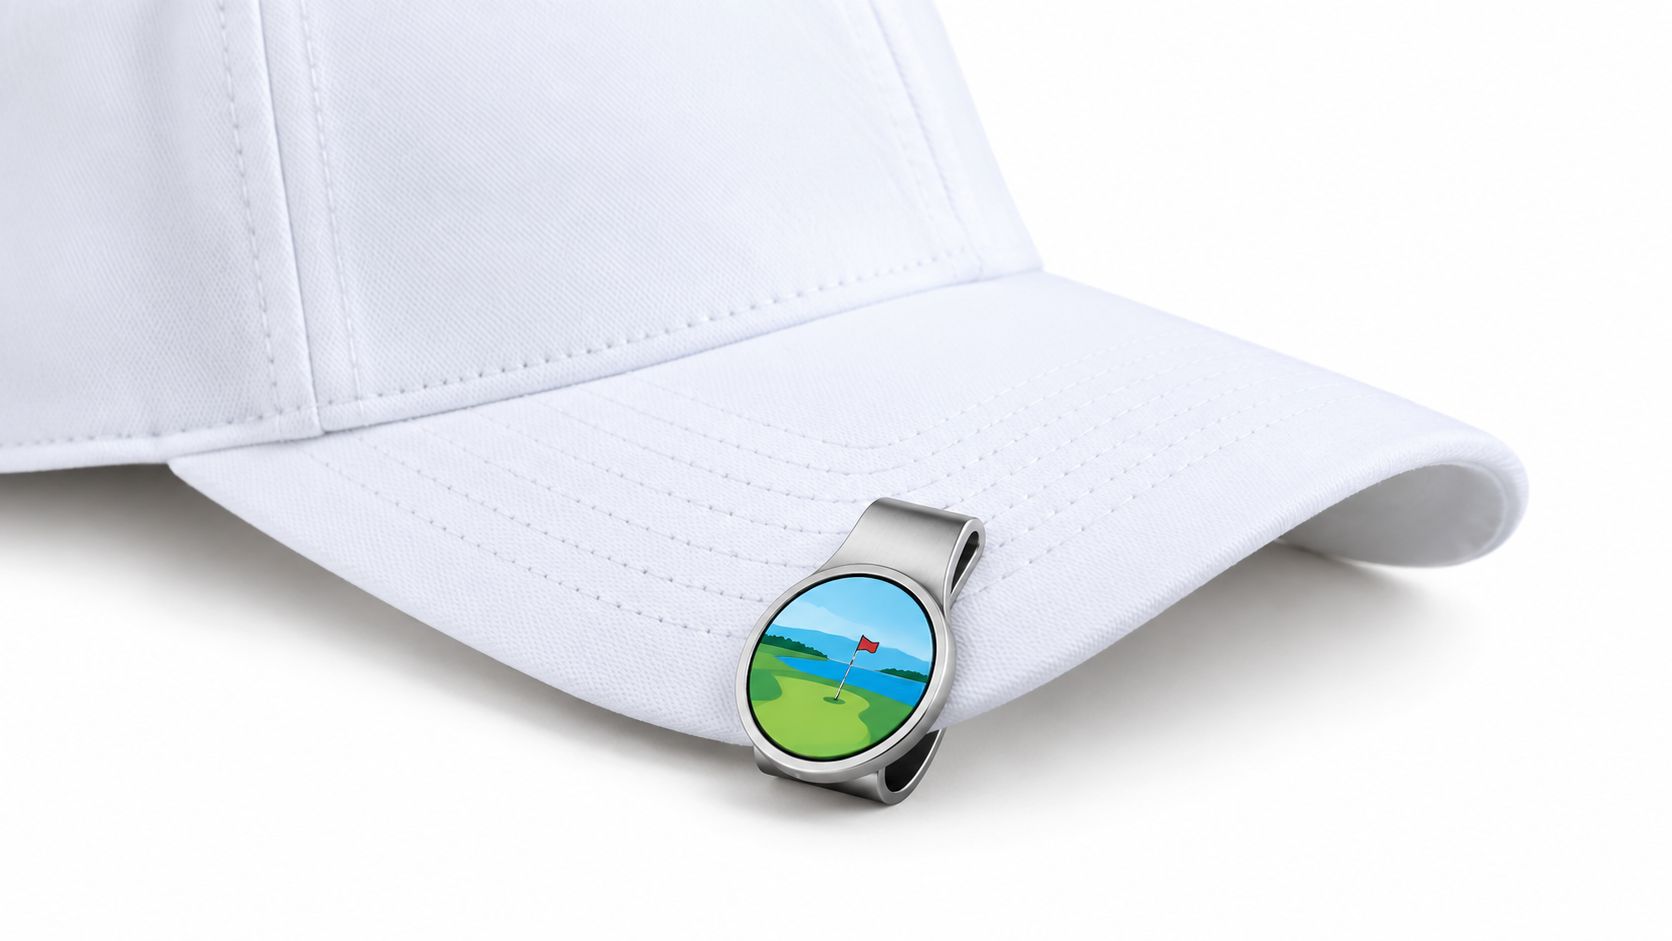
The category has a documented history beyond novelty golf merchandise. A representative U.S. patent application for a hat-mounted marker clip was filed on August 25, 2000, and issued as U.S. Patent No. 6,357,642. Its design used two hingably secured jaws and a magnet. The jaws attached to the inside of a cap's sweatband or visor while the magnetic marker remained visible on the outside.
That basic architecture still makes sense. The clip handles attachment, while the marker handles quick removal. Some designs hide the jaws against the inside of the headwear, and others slide directly over the brim. Either way, the golfer gets a visible, personalized accessory with a practical job.
Fit matters more than many buyers expect. A clip mounted on a loose or poorly fitted cap may shift as the hat moves, so it's useful to understand work cap fit explained before choosing where the accessory will sit. The best location is stable, comfortable, and outside your putting sightline.
Caddie's rule: If you can't remove the marker naturally with one hand, the clip is in the wrong place or the design is wrong for you.
Types and Materials Explained
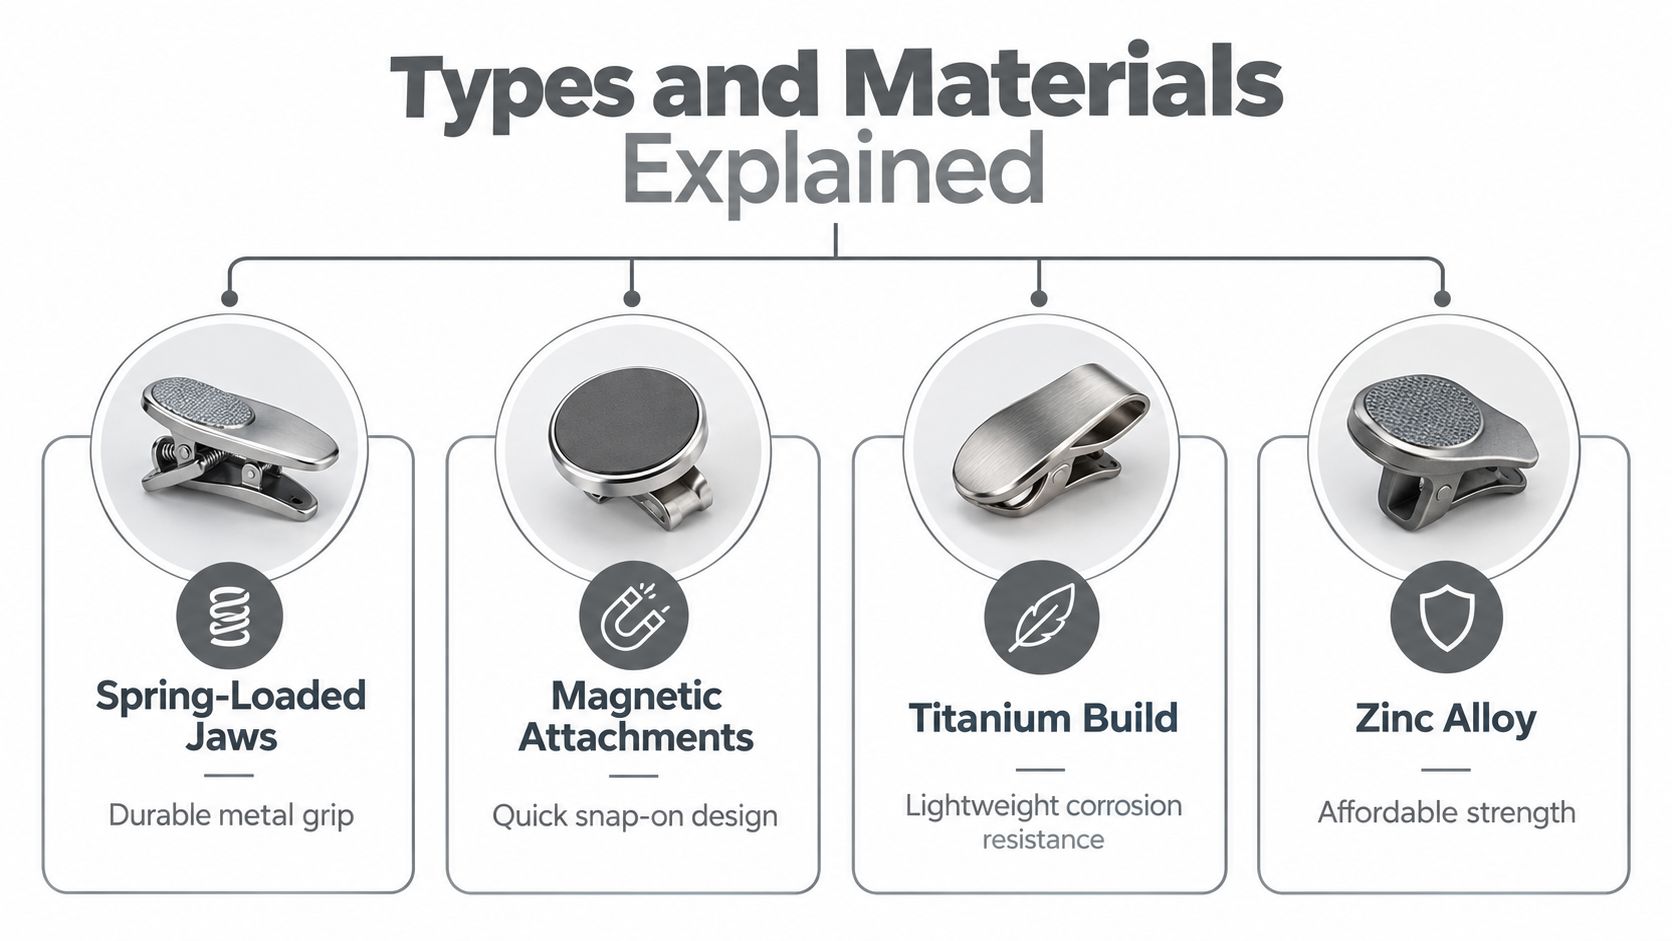
Most golf cap clips combine two separate jobs. A spring clip grips the brim, and a removable magnetic marker snaps onto the outer face. That split is important because a strong magnet can't compensate for a weak grip, while a powerful spring can make the hat uncomfortable or leave a visible crease.
The retention mechanism
Spring-loaded jaws suit golfers who want a familiar pinch-and-release action. The jaws open over the brim and close against it, creating friction that keeps the clip in place. Concealed jaw designs can look tidy, but they need enough clearance inside the sweatband or visor to avoid pressing into the head.
Magnetic attachments make the marker quick to retrieve. A marker that lifts cleanly from the clip is easier to use on the green, especially when you're wearing a glove or handling the ball with wet fingers. The trade-off is straightforward: stronger magnetic coupling helps prevent accidental separation, but it also demands more thumb force when you want the marker back.
One documented commercial specification uses a 25 mm diameter clip, 1.17 mm thickness, and a 24.5 mm diameter marker, as shown in this magnetic ball-marker cap clip specification. Those dimensions offer a useful compact benchmark, not a universal requirement. Test the actual product on the hat fabrics you wear.
Materials and brim contact
Metal clips usually provide a crisp spring action and a durable feel. Plated finishes can look polished, but scratches and exposed edges deserve attention in humid, sweat-heavy playing conditions. A rounded contact surface is preferable to a sharp edge because it spreads pressure and reduces abrasion on technical fabric.
Lightweight plastics can reduce pressure on a soft brim, though the spring action and hinge quality matter more than the material label alone. A metal clip with a harsh edge may damage a cap faster than a carefully finished polymer design. Titanium, zinc alloy, and stainless steel can all sound impressive in product descriptions, but construction and surface finishing decide how the accessory behaves in real use.
| Component | What to inspect | Why it matters |
|---|---|---|
| Clip body | Smooth, rounded contact points | Limits fabric marking and abrasion |
| Spring or jaws | Firm grip without excessive force | Prevents slipping without crushing the brim |
| Magnet | Positive attachment with easy release | Keeps the marker secure and usable |
| Marker face | Clear, comfortable shape | Makes one-handed handling easier |
For a broader look at how headwear and marker systems work together, compare the guidance in golf hats with magnetic ball markers. Don't buy based on the finish alone. The clip should disappear on your head during the round, not announce itself through pressure or distortion.
How to Attach and Use Your Clip
Start with a cap you actually wear for golf, not the stiff display model hanging in the shop. Structured cotton twill, soft performance fabric, a visor, and an unstructured cap all respond differently to clamping pressure.
Place it before you play
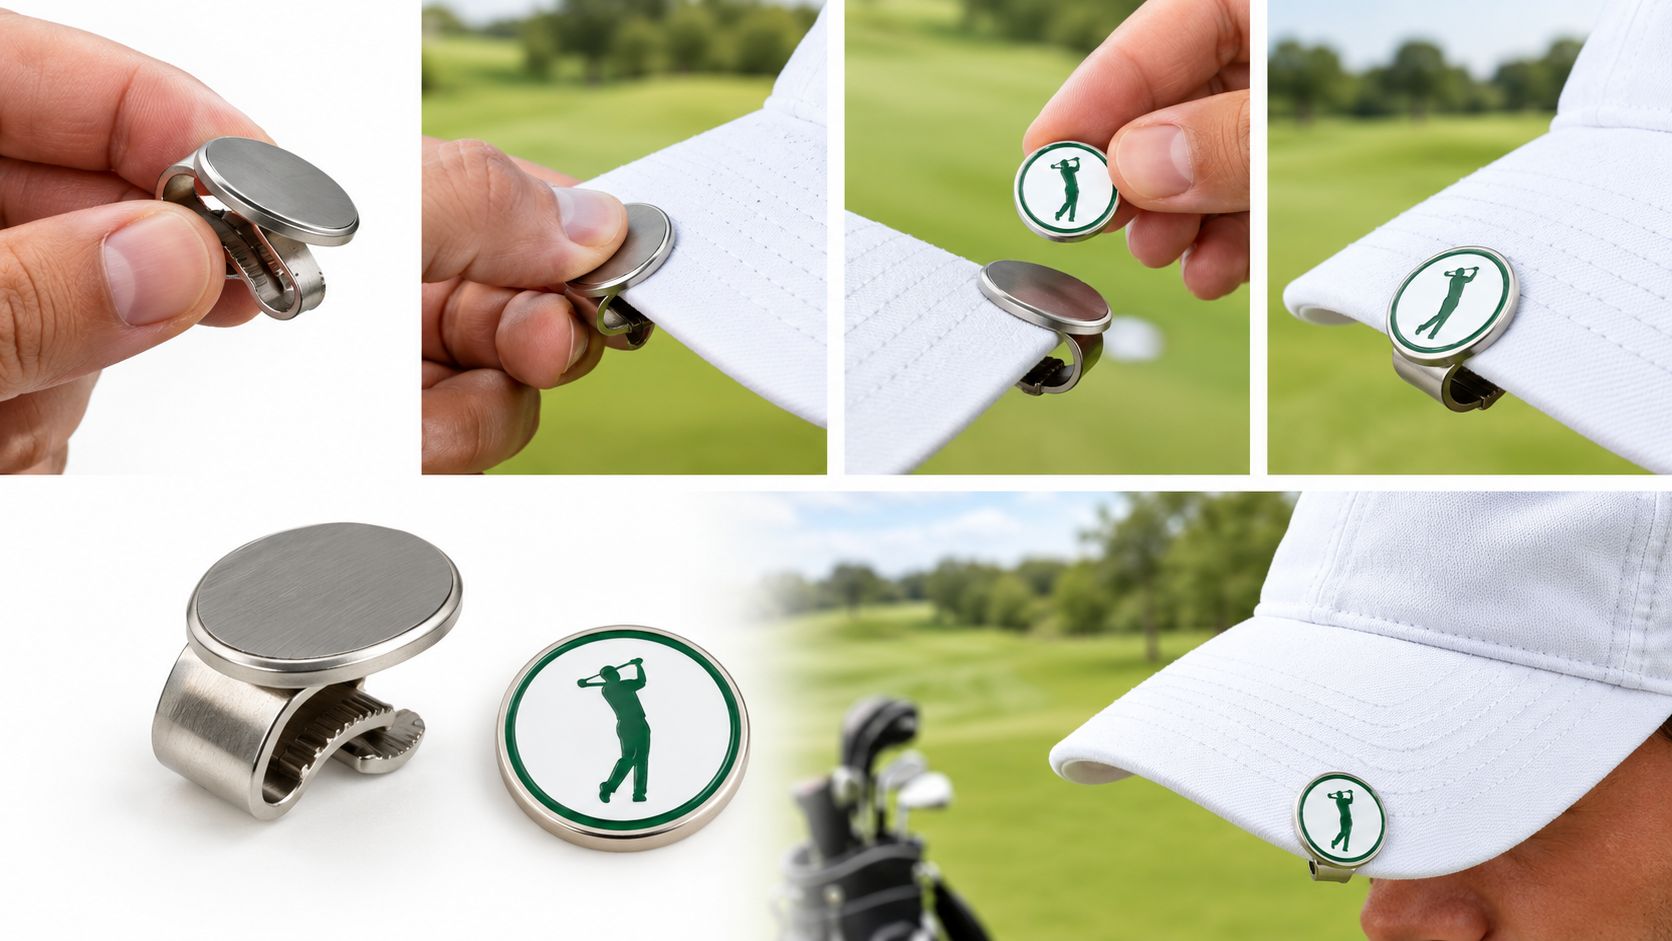
- Choose the brim position. Start on the side of the brim rather than directly in front of your face. The marker should sit outside your sightline when you address a putt, and it shouldn't catch against your sunglasses or interfere with a visor edge.
- Open the clip fully. Use the spring or pinch mechanism instead of forcing the jaws apart with a twisting motion. Twisting can damage the hinge or leave one side gripping more tightly than the other.
- Slide it over the brim. Push the clip onto a section with enough material to support it. Avoid a very thin edge, a folded seam, or a place where the brim already bends sharply.
- Check the inner contact. Run a finger along the inside of the hat. If the clip presses into your forehead, catches hair, or creates a hard pressure point, move it before the round starts.
- Test the marker. Remove it with the hand you'll use on the green, then snap it back into place. You should feel a clear magnetic connection without having to pinch, scrape, or search for the correct angle.
- Walk and swing test. Take a few practice swings and walk briskly while watching whether the clip tilts. If the brim bends or the marker rattles, reposition the clip or use a different hat.
The best placement depends on your routine. A right-handed golfer may prefer the side that the right hand reaches without crossing the face, while a left-handed golfer may choose the opposite side. That's a starting point, not a law. Your putting stance, sunglasses, hair, and brim shape decide the final position.
Retrieve it without fumbling
Before lifting your ball, touch the marker once. That small rehearsal confirms where it sits and prevents the familiar pocket search. Remove it with a short upward motion, place it immediately next to the ball, and keep the marker in your hand until the ball is safely lifted.
When you replace the ball, pick the marker up and return it to the clip before moving away. Don't leave the marker on the green while you line up or chat. A marker that stays on the putting surface becomes a forgotten object, not a useful accessory.
This demonstration shows the basic handling motion and gives you a visual reference before you test your own clip:
Practice removal while wearing a glove. Try it with damp hands. If the marker slips from your fingers during a living-room test, it'll be worse when you're on a sloped green with a group waiting behind you.
The correct setup feels boring. You put your hand to the brim, remove the marker, mark the ball, and return it without looking.
Pros and Cons of Wearing a Cap Clip
A cap clip earns its place by solving a small problem repeatedly. It keeps the marker in a known location, reduces pocket clutter, and lets you prepare for a putting task without breaking your rhythm. For golfers who regularly lose coins or tees in their pockets, that consistency is more valuable than the decorative appeal.
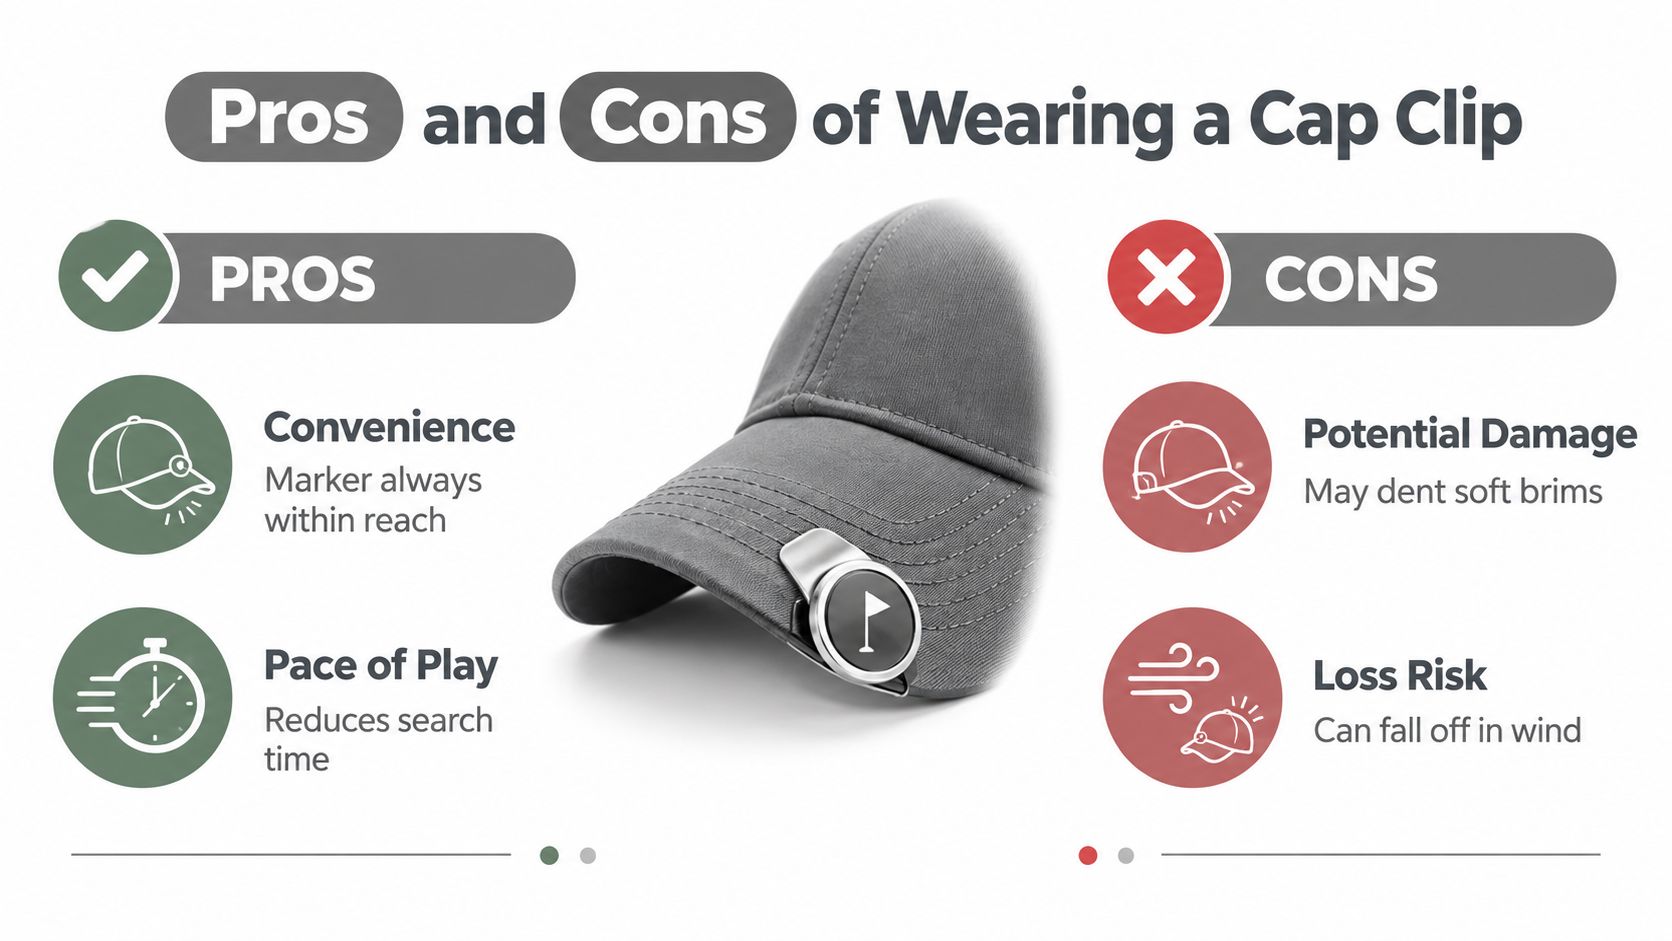
The disadvantages come from the same physical connection that makes the clip useful. The device applies pressure to a brim, and pressure can leave a mark on soft or lightweight fabric. A loose design can shift during a swing or come off in wind. A heavy marker can also make a flexible brim droop, which is a poor bargain for a little convenience.
Cap clip versus pocket storage
A pocket gives you flexibility. You can use a coin, tee, or purpose-made marker, and nothing touches the cap. The downside is that the marker competes with gloves, tees, repair tools, and loose change. You'll need to find it by touch each time.
A cap clip gives you a dedicated location. It works best for the golfer who wants the same motion on every green and doesn't mind a visible accessory. It works less well for someone who changes hats constantly or wears soft, delicate headwear that shows every pressure mark.
| Storage method | Strongest advantage | Main drawback |
|---|---|---|
| Cap clip | Immediate access in one fixed location | May affect brim comfort or shape |
| No contact with headwear | Marker can disappear among other items | |
| Glove attachment | Convenient during short transitions | Can interfere with glove use or grip |
| Bag storage | Keeps the hat clean and uncluttered | Too far away for quick marking |
The clip also has a style cost. A polished metal marker can add personality to a plain cap, but it can look like visual clutter on a heavily branded hat. Choose a finish that fits your headwear instead of treating the accessory as a separate outfit.
Good course manners still matter. A marker should speed up your routine, not create a reason to stand over the ball or rummage through equipment. Review practical habits in this guide to golf course etiquette, then decide whether the clip helps you stay organized without distracting playing partners.
Buying Considerations for Golfers
Buy the clip for the hat you wear, not for an abstract idea of a golf hat. A rigid structured cap can support a firmer spring than a thin visor. An unstructured cap may need a broader contact area so the jaws don't create a sharp crease. Thick winter headwear introduces a different problem, because a clip sized for a standard brim may not close cleanly around it.
Use this practical checklist
- Check brim compatibility. Measure or inspect the brim thickness across the caps and visors you use. A clip that fits one hat may pinch another.
- Prioritize a smooth underside. Rounded contact surfaces protect fabric better than exposed corners or rough plating.
- Test magnetic release. You want a firm snap and a deliberate release, not a marker that requires both hands.
- Inspect the profile. A thin assembly is less likely to press against your forehead or distort the brim.
- Consider the marker size. It should be easy to pick up with one hand without becoming an oversized obstruction on the green.
- Look for a stable finish. Scratches, chipped plating, and exposed edges deserve extra scrutiny if you play in wet or humid conditions.
- Check the sightline. The marker should remain outside your view when you address the ball.
The category now includes more than simple magnetic holders. A golf-tool retention clip covered in U.S. Patent No. 8,206,236 was filed on November 23, 2009 and granted on June 26, 2012. Its opposing panels slid onto a hat brim, placing a golf tool above the brim and a ball marker beneath it. That design points toward multifunctional systems, but more functions also mean more weight, bulk, and possible points of contact.
Buyer's test: Attach the clip to your softest cap, wear it for a walk, then remove it. If you notice the accessory before you notice the hat, keep looking.
Headwear choice affects the result as much as clip construction. A useful comparison of performance golf hats and gloves can help you identify fabrics, fits, and features that will tolerate on-course movement. Don't assume a premium cap automatically suits a clip. Lightweight technical fabric may feel excellent on its own and still show pressure marks.
For a complete kit, consider the accessory alongside the rest of your setup in this guide to best golf accessories. My recommendation is simple: choose the lowest-profile clip that grips your most commonly worn hat securely, then test it repeatedly before trusting it on a busy round.
Common Misconceptions About Golf Clips
The first misconception is that every cap clip damages a hat. That's too broad. A poorly finished edge, excessive spring force, or narrow contact point can mark fabric, but a smooth, properly fitted clip can sit securely without turning the brim into a crushed ridge. The central question is whether the clip matches the material and thickness of the cap.
The second misconception is that the strongest grip is automatically the best grip. It isn't. Excessive clamping can distort a lightweight brim and create an uncomfortable pressure point, while insufficient grip lets the clip slide during movement. Retention is a balance between security and release, not a contest to see how tightly the jaws can bite.
Rules matter more than the accessory
A cap clip itself isn't the concern under the rules. The marker's use is what matters. USGA guidance on marking, lifting, and cleaning the ball allows an artificial object such as a coin, tee, or purpose-made marker, provided the player places it immediately next to the ball before lifting it.
The same guidance states that a player receives a one-stroke penalty for failing to mark correctly, replacing the ball improperly, or making a stroke while the marker remains on the ground. That makes quick access useful, but it doesn't excuse careless placement. Remove the marker, set it beside the ball, lift the ball, replace it correctly, and pick the marker up.
A decorative design also deserves judgment. If the marker includes prominent alignment graphics, keep the intended purpose in mind. USGA guidance identifies limits for alignment aids, including less than one inch in height and less than two inches in horizontal dimensions when those features are used for alignment. A decorative emblem and an alignment aid aren't automatically the same thing, so don't rely on appearance alone if the design is oversized or raised.
The final myth is that cap clips are only for beginners. Experienced golfers lose markers too, and a repeatable routine helps anyone who values clean preparation. The accessory won't improve a swing, read a break, or rescue a poor club choice. It can remove one needless equipment decision from every green.
2ndShotMVP offers premium golf hats, beanies, and lifestyle apparel for men and women, with fun designs made for the course and the 19th hole. Visit 2ndShotMVP to find headwear you can wear confidently with or without a golf cap clip.


![300 Yd Bombers Club - Fun MVP - WhiteFun Hat [FlexFit]300 Yd Bombers Club - Fun MVP - White](http://store.2ndshotmvp.com/cdn/shop/files/closed-back-structured-cap-white-front-67005555ae157.jpg?v=1747428788&width=480)
![300 Yd Bombers Club - Fun MVP - WhiteFun Hat [FlexFit]300 Yd Bombers Club - Fun MVP - White](http://store.2ndshotmvp.com/cdn/shop/files/closed-back-structured-cap-white-back-67005555b0682.jpg?v=1747428789&width=480)
![72 - Fun MVPFun Hat [FlexFit]72 - Fun MVP](http://store.2ndshotmvp.com/cdn/shop/files/closed-back-structured-cap-multicam-black-front-666a5fa015432.png?v=1747448488&width=480)
![72 - Fun MVPFun Hat [FlexFit]72 - Fun MVP](http://store.2ndshotmvp.com/cdn/shop/files/closed-back-structured-cap-multicam-black-back-666a5fa017c12.png?v=1747448489&width=480)